Warning: autorecording must be always ON on TikiLIVE if someone uses 3rd party broadcasters and wants to record their live session with TikiLIVE.
In this page we exemplify how you can broadcast using Masterplay OnAir on your channels.
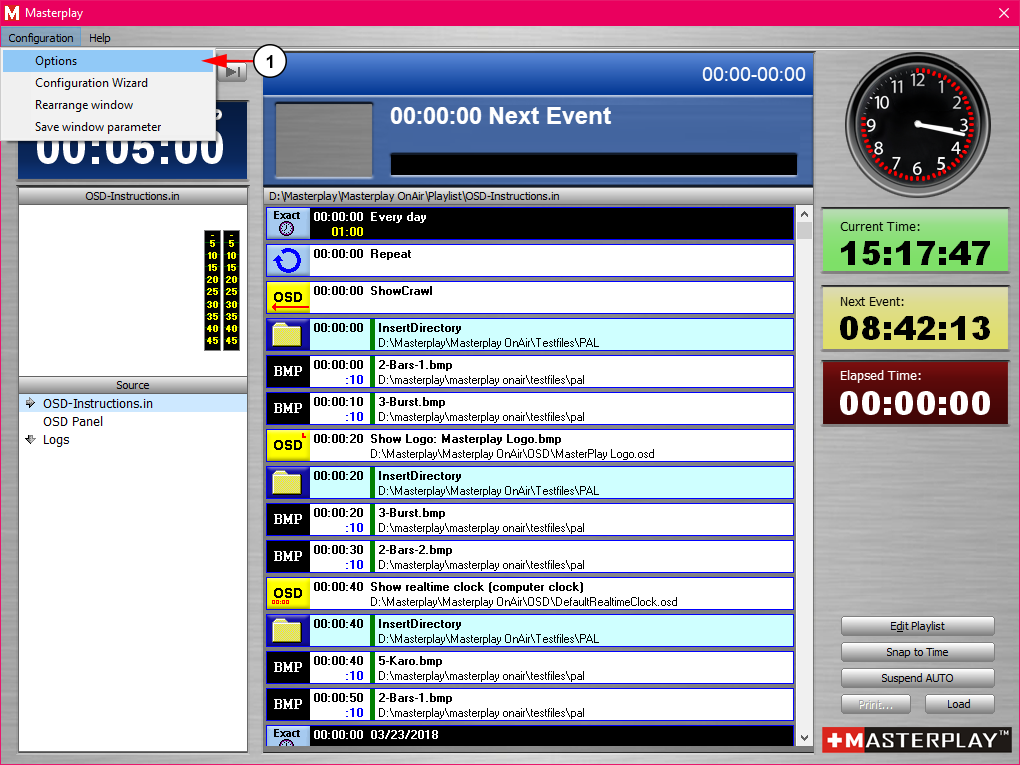
Open the Masterplay OnAir application to configure your channel:
1. In the top menu, click on Configuration and then Options.
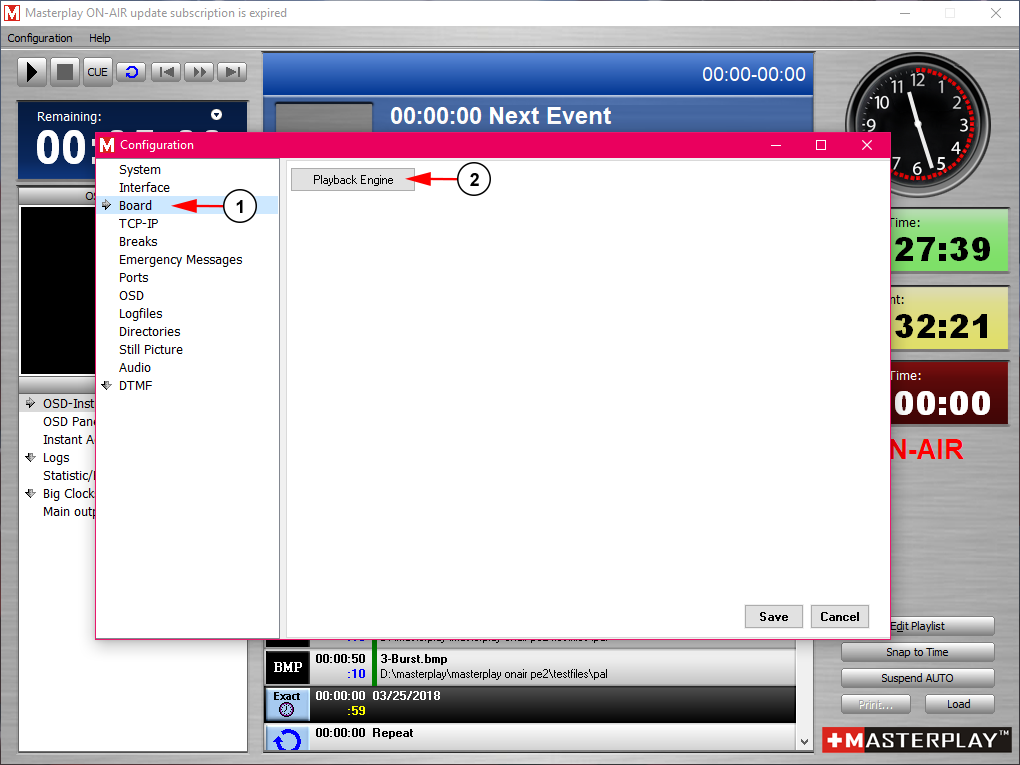
The Configuration window will open along with the settings menu:
1. Click on the Board menu option.
2. Click on Playback Engine to open your streaming settings.
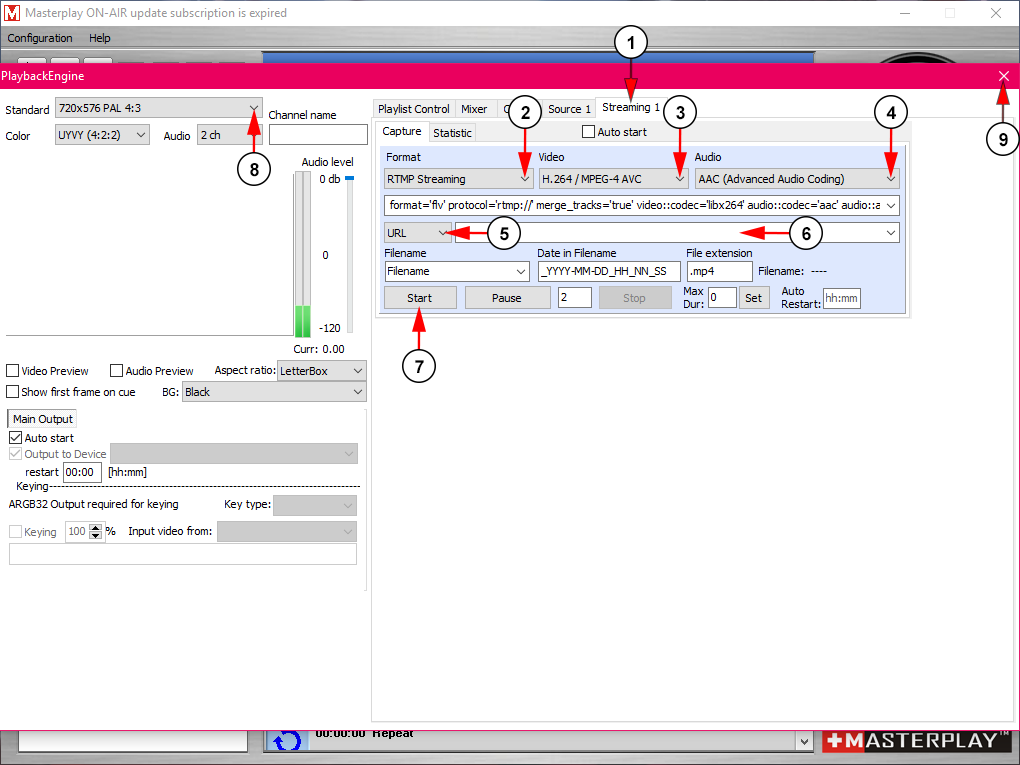
Once the page opens, you will be able to configure your streaming channel:
1. Click The Streaming 1 tab to configure your channel.
2. Make sure RTMP Streaming is selected from the Format drop down menu.
3. Make sure H.264 / MPEG-4 AVC is selected from the Video drop down menu.
4. Make sure AAC (Advanced Audio Coding) is selected from the Audio drop down menu.
5. Make sure URL is selected on the drop down menu.
6. Insert here the streaming URL from the Broadcast Settings page.
Note: Make sure you are using the Broadcasting Settings from the provided Masterplay OnAir option as the broadcaster requires a different format for your RTMP address and stream name with a URL combination of the two. This will come out at “RTMPAddress/StreamName”.
For example, if your RTMP Address is rtmp://origin.tikilive.com/show_tikilive/39589?streamID=bjxnxJ8D2E and your Stream Name is bjxnxJ8D2E, then your new server address for Masterplay OnAir will be rtmp://origin.tikilive.com/show_tikilive/39589?streamID=bjxnxJ8D2E/bjxnxJ8D2E
7. Click here to start streaming to your channel.
8. Select your streaming resolution from the drop down menu here.
9. When you are finished, close the window here.
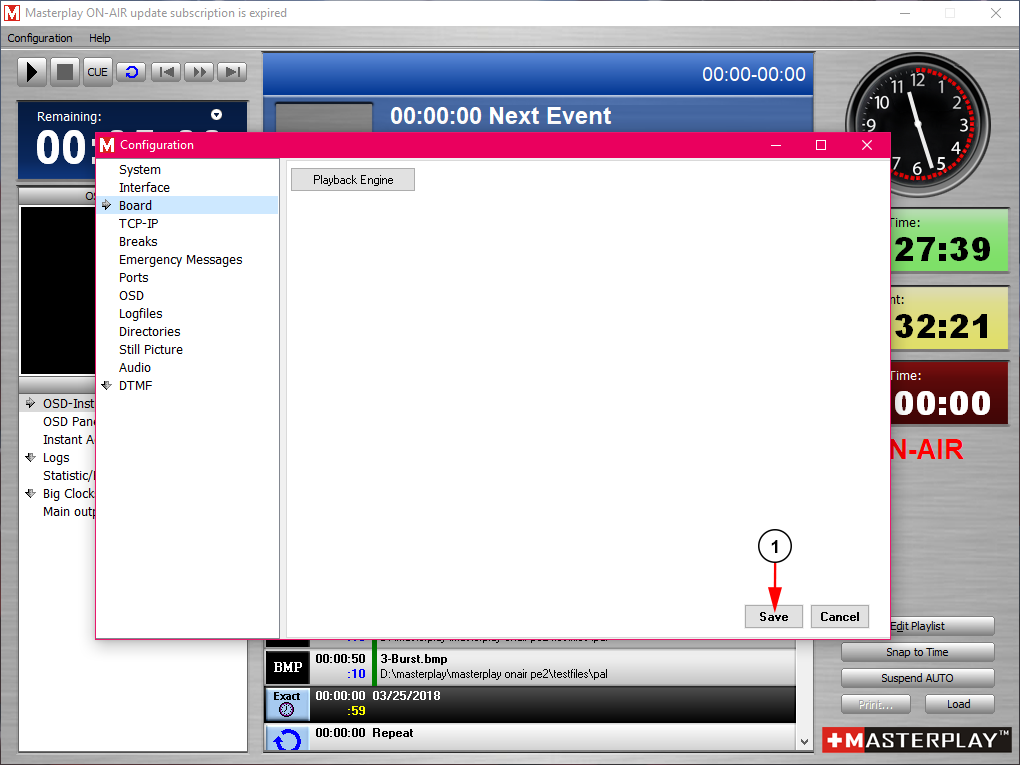
When you are done configuring the broadcaster with your streaming channel, save your settings to confirm them:
1. Click the save button to confirm your settings.


