In order to manage your existing audio files and add new ones, click on Music Library link, in My Radios chapter:
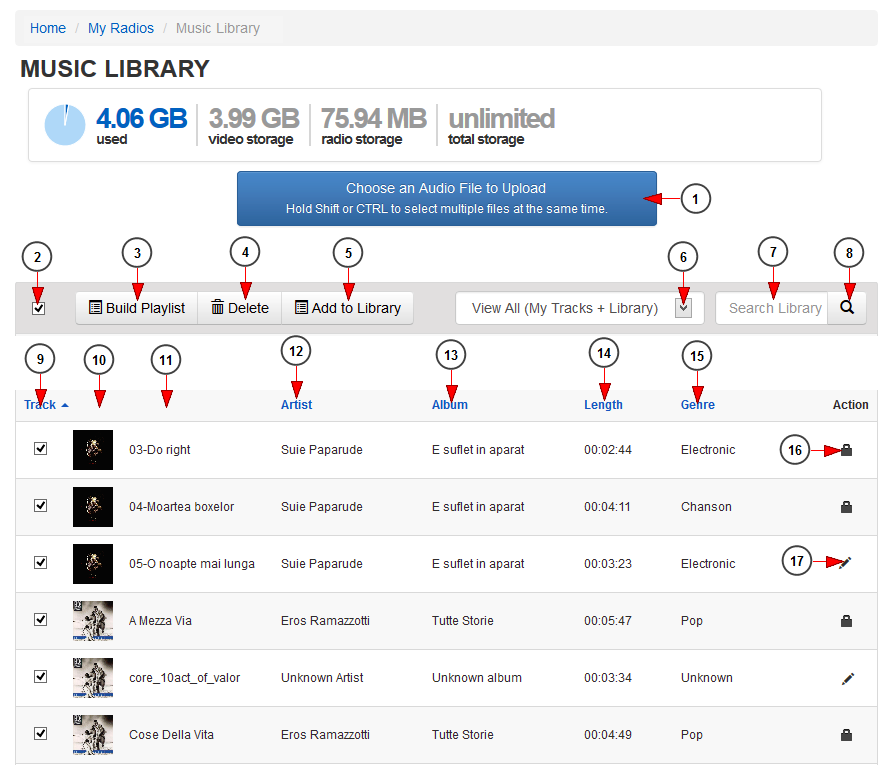
When the page opens you can view the audio files existing in Music Library:
1. Click here to upload an audio file from your computer.
Note: You can upload multiple files at the same time by holding Shift or Ctrl buttons on the keyboard while selecting the files. You can upload only mp3 audio files.
2. Here you can select the all the audio files from the page.
3. Click here to create a new playlist with the selected tracks.
4. Click here to delete all selected tracks.
Note: Users are allowed to delete the audio files uploaded by them. If the administrator of the website has enabled the permission, users can also delete the files from the public library.
5. Click here to add the selected tracks to the public library.
Note: Once the tracks are added to the public library, the amount of storage used by the files is cleared.
6. Select from the drop-down menu the files you want to see displayed: View All, View My Tracks, View Library. View All lists the tracks in the TikiLIVE library and the content you have uploaded. View My Tracks lists all of your content that you have uploaded so far. View Library lists all of the music track in the TikiLIVE Library.
7. Insert here the title of the track you want to search.
8. Click here to search the desired track.
9. Here you can select the desired tracks in order to create a playlist, delete them or add them to the public library.
10. Here you can see the thumbnail of the track. When hovering the mouse over, the Play button is displayed and you can start playing the song.
Note: a preview of the audio file will be played, only a few seconds of the track.
11. Here you can see the title of the track and the track thumbnail.
12. Here you can see the name of the artist.
13. Here you can see the name of the album.
14. Here you can see the length of each track.
15. Here you can see the genre of each track.
16. The lock icon indicates that the file cannot be edited because it is part of the TikiLIVE Library and is covered by the different Performance Rights Organizations we belong to. The metadata for the tracks in our music library are NOT editable.
17. The pencil icon indicates that the file is one of your uploaded tracks in which the details can be edited.
Note: User’s are responsible for their own uploaded content and any 3rd party royalty fees or licenses that apply.
Upload and edit file
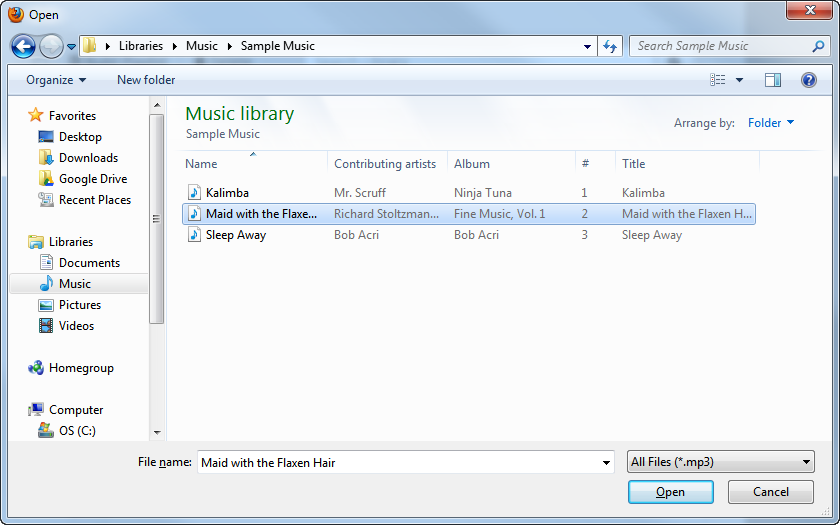
When you click the Choose an audio file to upload button, a pop-up window will open and you can select the file from computer:
Select the audio files you want and then click Open to upload the file in your Audio Library. You can select multiple files to upload at the same time.
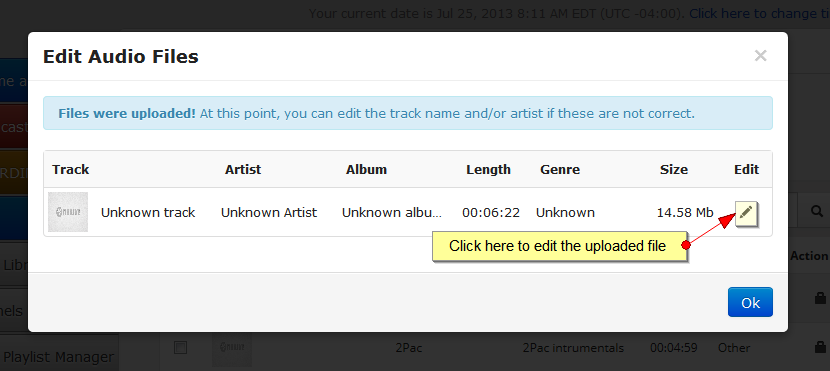
The audio file will be uploaded and an overlay window will be displayed:
Click on the edit icon if you want to change the details about the track, artist and album.
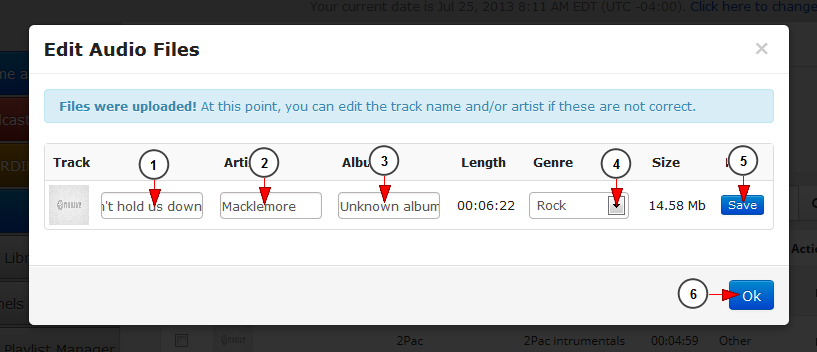
You will be able to insert the text in editable fields:
1. Type here the name of the track.
2. Type here the name of the artist.
3. Type here the name of the album.
4. Select the genre of the song from the drop-down menu.
5. Click here to save the details.
6. Click here to close the overlay window.
Notes:
- Our platform is adding all the details of the track by reading the id3tag of the MP3 file you are uploading. If the id3tag is not OK, then the system cannot find any information related to it.
- The tracks uploaded by a user can be viewed only by him; other viewers do not see them.
- The thumbnail of the audio file listed on the website is taken from the album cover while reading the id3tag details.
- If the same id3tag were used on another mp3 file that was previously uploaded on the TikiLIVE platform, then the system will not upload the new file as it will appear as a duplicate file.


