Important: If the stream done with SAM broadcaster is not playing on the channel, please restart the channel from channels listing page (see items 6 and 7).
SAM broadcaster PRO is a professional audio broadcaster which comprises multiple features that will convert your radio channel into a professional one. SAM broadcaster functions only with Windows operating systems.
You can download SAM broadcaster, by registering with your email address.
Before starting to use the broadcaster you can check the following page to view the hardware requirements for using SAM broadcaster: http://spacial.com/help-center/sam-broadcaster/sam-broadcaster-getting-started-01-before-you-install-sam-broadcaster.
Note: when installing SAM broadcaster it is mandatory to install Firebird plugin as well.
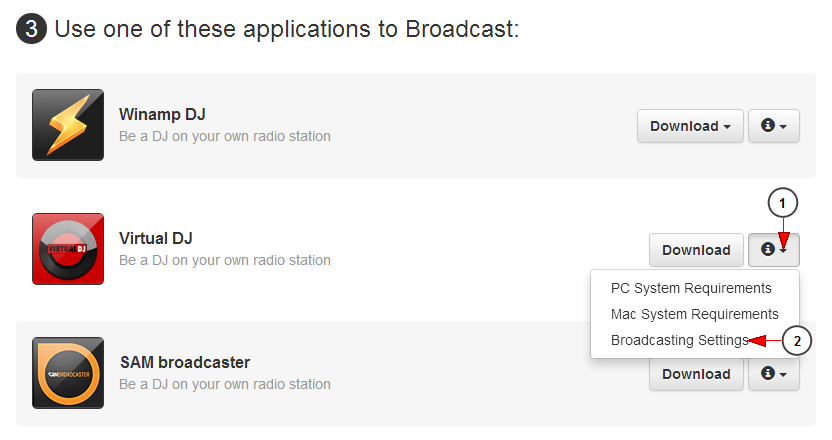
The first thing you need to do is to view the broadcast settings for SAM broadcaster from your account dashboard:
1. Click here to open the drop-down menu.
2. Click here to view the broadcast settings for SAM broadcaster.
An overlay window will be displayed and you can view the settings you need when configuring SAM broadcaster application in your computer:
1. Here you can see the radio host-name.
2. Here you can see the DJ port number.
3. Here you can see the stream ID.
4. Here you can see the DJ username.
5. Here you can see the DJ password.
Note: the DJ credentials are the ones you insert when you create a new radio channel. The username and password can contain only letters, numbers and dashes (a-z/A-Z/0-9 -).
6. Click here to close the overlay window.
Once you downloaded and installed the application, you can start configuring the settings.
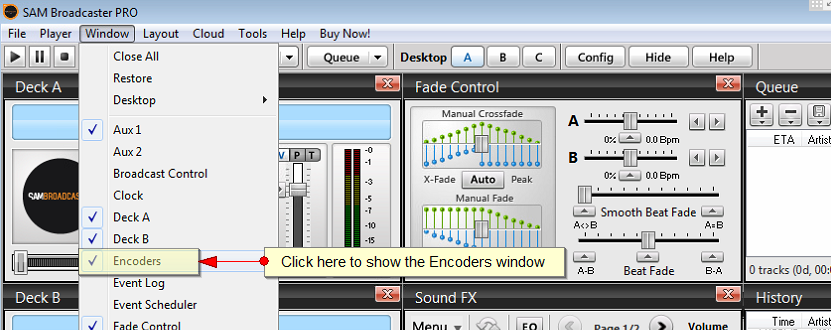
Being a professional broadcaster, the application has multiple features and windows. You can select which windows you want to view displayed according to your needs:
You need to open the Encoders window as it is essential in configuring the streaming settings.
On the Encoders window select to add a new encoder:
1. Click here to open the menu.
2. Click here to add a new encoder.
The next step is to select the plugin:
1. Check the radio button according to the plugin you want to use.
Note: it is mandatory to use the MP3 (LAME_ENC) as it is working as expected with TikiLIVE platform.
2. Click here to save the plugin settings.
The Encoder & Streamer configuration window will open as you can see in the picture below:
1. Click here and select from the drop-down menu the desired streaming bit-rate.
Note: we recommend using 128 kbps for a good sound quality.
2. Click here to select the mode: stereo or mono.
3. Click here to select the sampling rate.
4. Click here if you want to auto-start the encoder.
5. Select the number of seconds for the auto-encoder to restart.
6. Click here if you want to the encoder to reconnect in case it disconnects.
7. Select the number of seconds for the auto-encoder to reconnect.
8. Check this box if you want to allow strips in the stream.
9. Click here to save the settings.
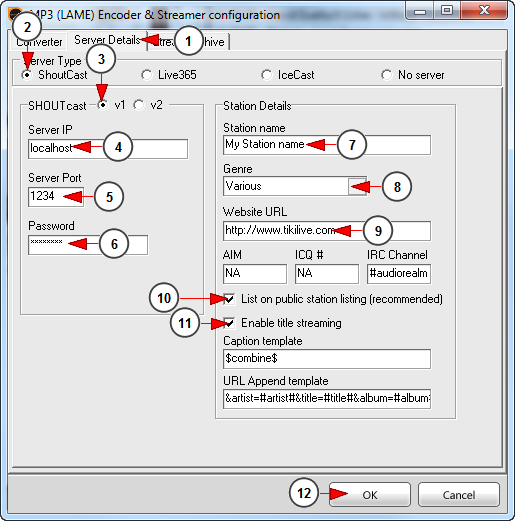
The next step and the most important is to configure the Server settings:
1. Click here to open the Server details window.
2. Check this radio button to select ShoutCast server.
3. Check this radio button to select v1 server type.
Important: it is mandatory to select the ShoutCast server and V1 as server type.
4. Insert here the server IP or hostname – here you should add the “Radio Host Name” taken from broadcasting properties page.
5. Insert here the server port – here you should add the “Stream ID” taken from broadcasting properties page.
6. Insert here the password – here you should add the DJ username and password (with “:” between them) that you set on the edit channel page..
Note: the password is composed from DJ’s credentials as follows – DJ username:DJ password; example: if your DJ username is user and the DJ password is 1234, the password that will be entered on the SAM Broadcaster is user:1234.
7. Insert here the radio station name – you will add the desired name for your radio station. This name is not visible in TikiLIVE platform.
8. Select the musical genre of your radio channel – you will select the desired genre for your radio station. This genre is not visible in TikiLIVE platform.
9. Insert here the website URL – here you should add the “Radio Host Name” taken from broadcasting properties page.
10. Check this box if you want your playlist to be listed on public station listing.
11. Check this box if you want to enable the song title streaming.
12. Click here to save the details.
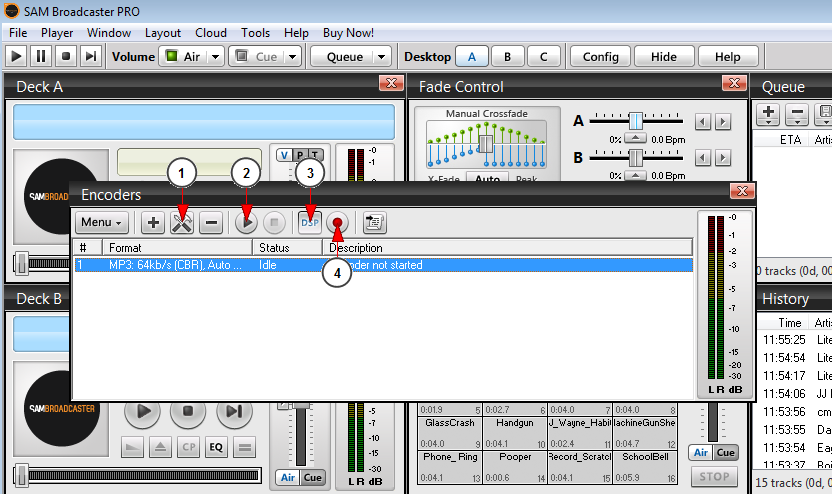
Once the streaming settings are configured you can start broadcasting:
1. Click here to open the encoder&streaming configuration window.
2. Click here to start streaming on the radio channel.
3. Click here to select the Audio DSP pipeline as input source – mandatory.
4. Click here to record the sound from the soundcard.
Note: when streaming with SAM broadcaster the song cover will not be displayed on the radio channel page, (the radio thumbnail is displayed) only the song title and artist will be displayed.
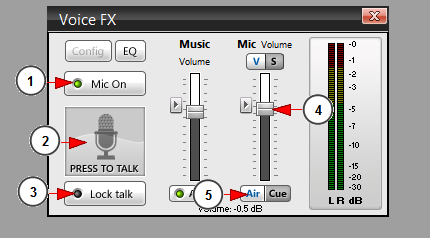
The next step is to adjust the microphone if you want to talk to your radio channel listeners:
1. Click here to turn on the microphone.
2. Press here to talk.
3. Click here to lock the microphone.
Note: the lock button will turn on your microphone. When you finish talking press the button again and your microphone will be turned off. Your radio channel will continue playing the tracks on your playlist.
4. Drag the button to adjust the volume of your microphone.
5. Click here to activate the microphone output.
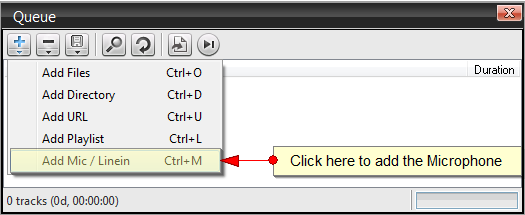
If you want to stream the audio from the microphone attached to the PC, then you must first add it on the Queue:
Then you will have to adjust the microphone settings or leave them as they are:
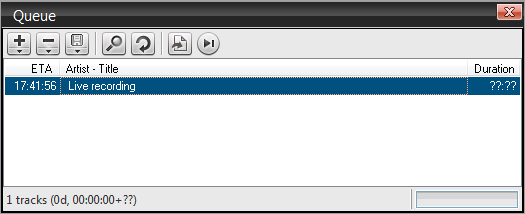
After this you will see the microphone on the Queue:
Clicking on Start Encoder the microphone will start playing on your radio channel.
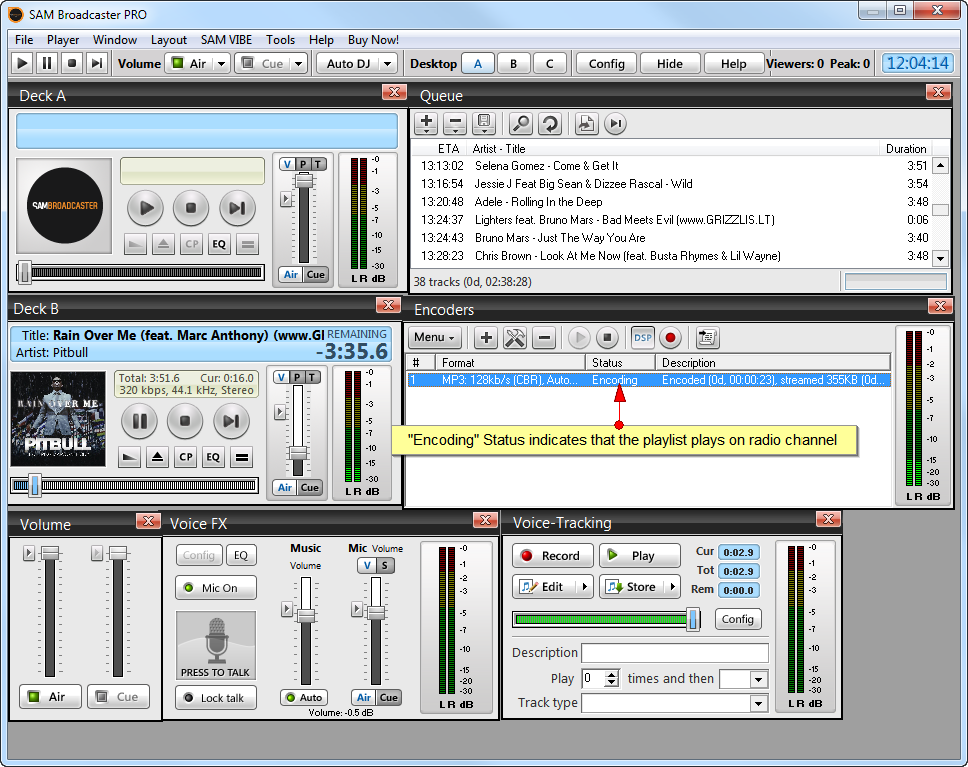
Once all settings are completed you can start encoding your SAM broadcaster playlist on your radio channel:
SAM broadcaster PRO is a miscellaneous application which has multiple audio features and you can use them according to your desire depending on the audio input you want to give your listeners.

