Facebook Page Photos Configuration allows you to set the options you prefer in order to upload photos from Facebook to your own webpage.
Note: the Facebook page (not profile) needs to be PUBLIC, for the Facebook Page Photos plugin to work properly, otherwise the plugin cannot retrieve data from Facebook page if the content is private.
Click on the Facebook PP link, under Settings menu:
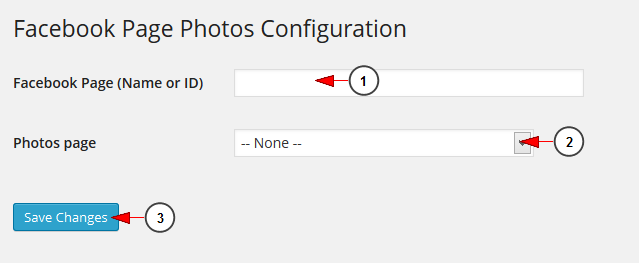
Once the page opens you can edit the Facebook page photos settings for your web blog:
1. Insert your Facebook name or ID.
Warning: do not insert the entire URL as in www.facebook.com/user but only the name or ID as in user.
2. Click on the drop-down list to choose the photos page where you want your Facebook Gallery to be shown.
3. Click here to save changes.
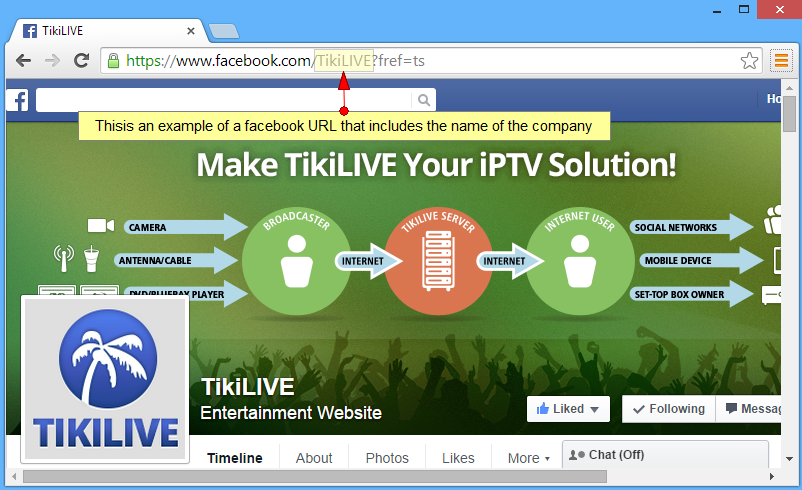
This is an example of a Facebook URL where the company name was published – it can be seen in the URL:
The company name, needs to be inserted in Facebook Page Photos Configuration (no.1 in the picture above).
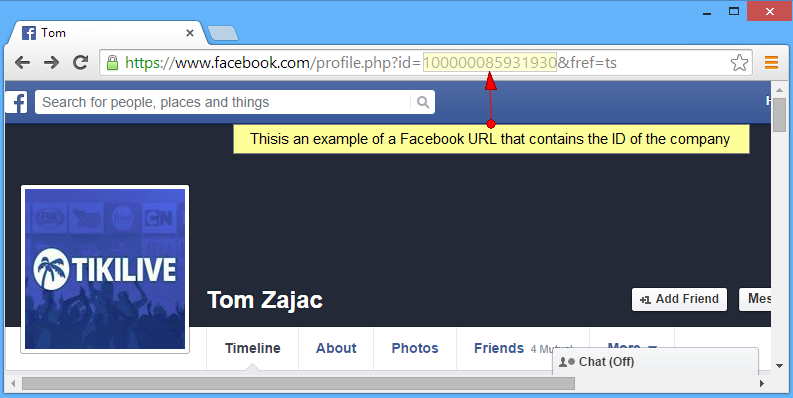
This is an example of a Facebook URL where the company name hasn’t been published:
The company ID, needs to be inserted in Facebook Page Photos Configuration (no.1 in the picture above).


