Note: In order to have the channels available for WordPress display, they need to be previously published from TikiLIVE dashboard area.
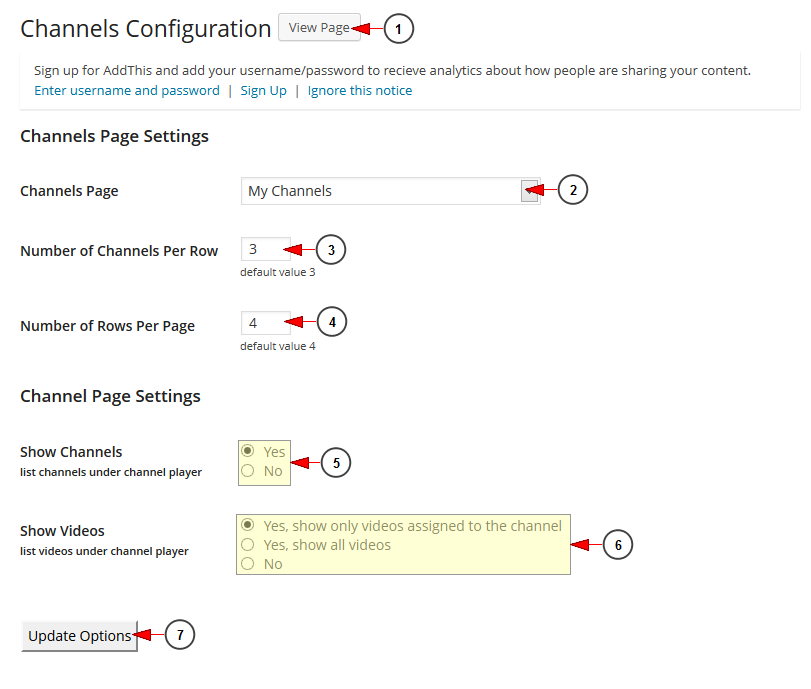
The Channels Page Configuration allows you to set parameters you want for your TikiLIVE Channels to be displayed on the selected page.
Click on Channels link, under Settings chapter:
Once the page opens you can configure the Channels Page settings:
1. Click here to view the Channels Page on your web blog.
2. Click on the drop-down list to select the default page for the Channels page.
Note: Setting a default channel page is required, having an assignment of – None- will mean that none of your channels will link properly.
3. Insert the number of channels you want to be displayed on a row.
4. Insert the number of channel rows you want to be displayed on the Channel page.
5. Check Yes radio button if you want to display the channels under the channel player or the No radio button if you don’t want to display the channels under the channel player.
6. Check the radio button according to the option you prefer for showing videos under the channel player: show only videos assigned to the channel, show all videos, do not show any videos.
7. Click here to update the options you have made.
Note: the plugin for Channels does not work on remote WordPress installs. It is connected directly to the application.
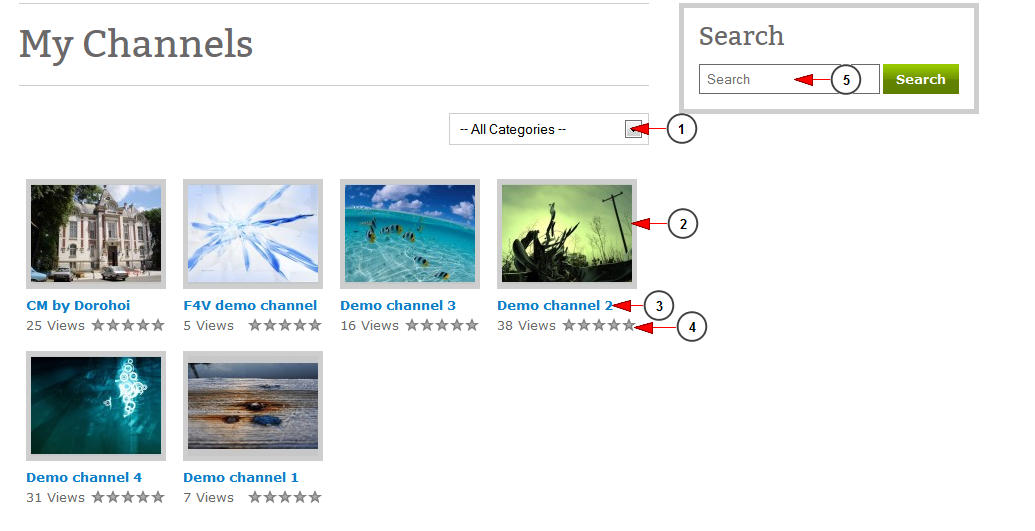
This is how My Channels page looks on the blog:
1. Click on the drop down list to select a particular channel category.
2. Here you can view the thumbnail of the channel.
3. Here you can view the name of the channel.
4. Here you can see the rating of the channel.
Note: the standard WordPress functionality is that the Channel Ratings are imported from the TikiLIVE platform and they are only displayed in the web blog. You cannot rate the channel on the blog.
5. Insert here the item you want to search on the website.


