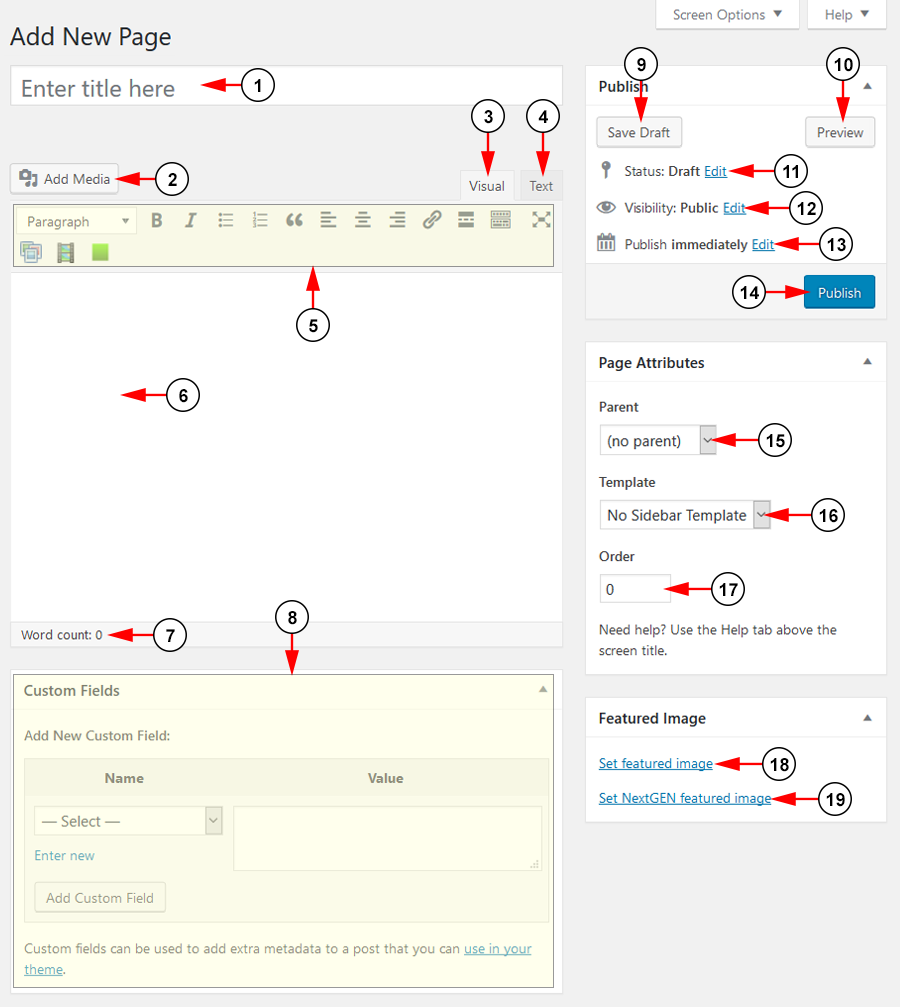
Click on the Add New link in order to add a new WordPress page:
Adding a new page is similar to writing a new post:
1. Insert here the title of page.
2. Click here to insert media files in the page.
3. Select the visual mode to view and edit the page.
4. Select the HTML mode to view and edit the page.
5. Here you can see the tool-bar with writing options.
6. Type the text for the page here.
Note: user can change the text format, by using the tool-bar that contains standard editing functions.
7. Here you can view the number of words you typed in the page.
8. Here you can insert custom fields to add extra metadata to a post.
9. Click here to save the draft, at any time while writing.
10. Click here to preview the page on the web blog.
11. Click here to expand the edit options for the status of your page: draft or pending review.
12. Click here to expand the options for the visibility of the page. You can select to make it public – with the option of publishing it immediately, password protected or private.
13. Click here to edit the options for publishing the page immediately, select the date and exact time when you want the page to be published.
14. Click here to publish the post or update it has already been published.
15. Click on the drop down list to choose a parent page.
16. Click on the drop down list to choose a template for the page.
- Home template – you have access to homepage content and homepage sidebar only
- Contact template – the site will generate a contact form. Email will be sent to the site admin
- No Sidebar template – you will have a site without sidebars
17. Insert the number to order the page in the list of Pages.
18. Click here to set a featured image to the page.
19. Click here to set a featured image for the NextGEN Gallery to the page.
Important: users are not allowed to post a Java script on TikiLIVE WordPress blogs as it can be used for malicious purposes. If you want a Java script added to your page, contact our team, who will investigate the script and add it for you.


